Showing posts with label cheap fix. Show all posts

10.04.2010

Starburst mirror envy


We have lived here for over four years now. Many of our walls look like we just moved in. This one is pretty representative of most of the house :)

IMG_4912

That, combined with my love for starburst mirrors, helped to get this project going. However, I have spent way too much time trying to mimic those that I see. I have been thinking, and thinking, and thinking about how I can get metal strips to use. Then, like she always does, Miss MustardSeed created one in brilliant fashion. I then realized, “DUH!”, it doesn’t have to be metal.
So, I started with this….
IMG_4883

(One package of bamboo kitchen skewers, one candle mirror, and one jar of stain we already had.)

Did a little bit of this….

IMG_4884

Fought off the thieving kitten because of this…..
 IMG_4894
*The jury is still out on whether or not kitten spit helps or hinders stain from sticking to bamboo skewers*
Wished I had thought to bring the mineral spirits up because of this….

IMG_4891

(Yes, I know. Painted nails and DIY do not go hand in hand. I’ve quit biting my nails, for the 100000th time, and painting them helps me leave them alone.. until it starts to chip…which is it now.. AH)

I let it all soak up and dry like so….

IMG_4889

And then came the tricky part: assembly. I started with Gorilla Glue. While it is AHmazing stuff. It takes too long to dry for something like this. So, I used hot glue.

IMG_4910

With no planning whatsoever, I started gluing.

 IMG_4905


Because I used wood stain instead of paint, each one it a bit different in color. Luckily, that’s what I wanted :)

IMG_4899

The photos don’t really do it justice. Once Dustin gets home, we are going to find something to attach to the back to make it more secure and attach a hanger to that.

A few weeks ago, I saw some similar to this at an antique store… for $25. Although that was a good price, my grand total for this is a WHOLE lot better :)

This is a great way to fill a wall with one piece. This started with a 5 inch mirror and is now 28 inches.
I have enough materials to make one more. I think I might paint the skewers silver this time to mimic all those metal ones I’ve drooled over for so long. I’m also going to change up the pattern to make it different from this one.

I know, I know… the anticipation…. :)

6.17.2010

Coffee table redo and crisis (narrowly) averted

Good news first:
This pretty lady just got a new look. 

I've been wanting to change up the coffee table recently and after nine days of toddler invasion, I had my excuse. (NO, Daniel, I didn't redo it just because of the Hadster :) he just gave me an excuse)


I still like the all black look, but this piece needed some touch up. It was painted 4 years ago and was showing the wear and tear that a well used coffee table gets. 


I'm an off and on fan of the distressed look. This distress was au naturale though... and it wasn't pretty.

I used the sample jar of Gobi Desert Behr paint that I got from the Shop and Hop that I did a few months ago. I skipped painting the top for now because I wanted to see what the black looked like.

Yeah, I painted in my living room.. don't judge... it gets worse further down :)
I really liked it like this but I still wanted to try out the "glazed" look. I didn't have any glaze but I did have wood stain. I have seen Gail at My Repurposed Life do this once. (If you've not seen Gail's blog, you are MISSING OUT!) 

So, I broke out the stain, got a rag and an old paintbrush and started applying the stain in small sections and wiping it off. 


Yes, I am still sitting in my carpeted living room for this... (take back your gasp! The carpet in here is horrible and we plan to rip it up and lay flooring that we salvaged from Dustin's great grandparents--- one of these days...)


So, what do you think? I'm happy with it. Once I got it done, I had Dustin help me flip it over. Then, I went over some places and "dry brushed" what stain was left in the brush in areas where I thought it needed to be darker. 

Then, in a moment of "I didn't think this through well..." I emailed Gail about it setting up. Stain is supposed to soak into wood. I was nervous about it being tacky for life. But, she said that it should cure and suggested waiting until then if I want to spray poly it for some added protection.

I promise, I will spray poly outside. :)

I thought about slightly distressing it, but I think I'll wait until it starts getting beat up on its own. 


I am going to paint the top black again. It needs another coat again for some touch ups. 

What do you think? Any suggestions? 

And in not so good news....
There really was some chicken drama this afternoon. Dustin went out to check on them around 6 to only find one of 8 birds. There were feathers everywhere. After a search, 5 were found hiding out in the woods. While he was out on a search and out talking to neighbors, another showed up, missing all her tail feathers and soaking wet. She's ok, but has some really raw places on her. One is still missing. The culprit is a male boxer who lives a few houses away through the woods. He was near the yard when Dustin was out there. When he tried to talk to the owners, the dog wouldn't let him near the yard. So.... it looks like the ladies aren't going to be allowed to run free.. in our OWN yard during the day anymore. I don't mind when dogs aren't tied or confined as long as they are easy going and just want to eat our scraps! This dog has been here a few times and just seems mean. (and I'm not a boxer hater.. I adore the two I know) But, I am not a fan of mean dogs-- who is?  He's caused some other trouble in the neighborhood as well. Luckily, only one of the ladies is missing. We hadn't seen him in our yard for a month or so, so we thought he was fenced in finally. Wrong-o. The hurt one is spending the night in Ellie's dog cage in the garage. He's been putting antibiotic on her. We're keeping her away from the rest for a while because chickens are mean little things and will peck an injured one to death. Hopefully, she can join the rest of them soon.

Never a dull moment!

3.27.2010

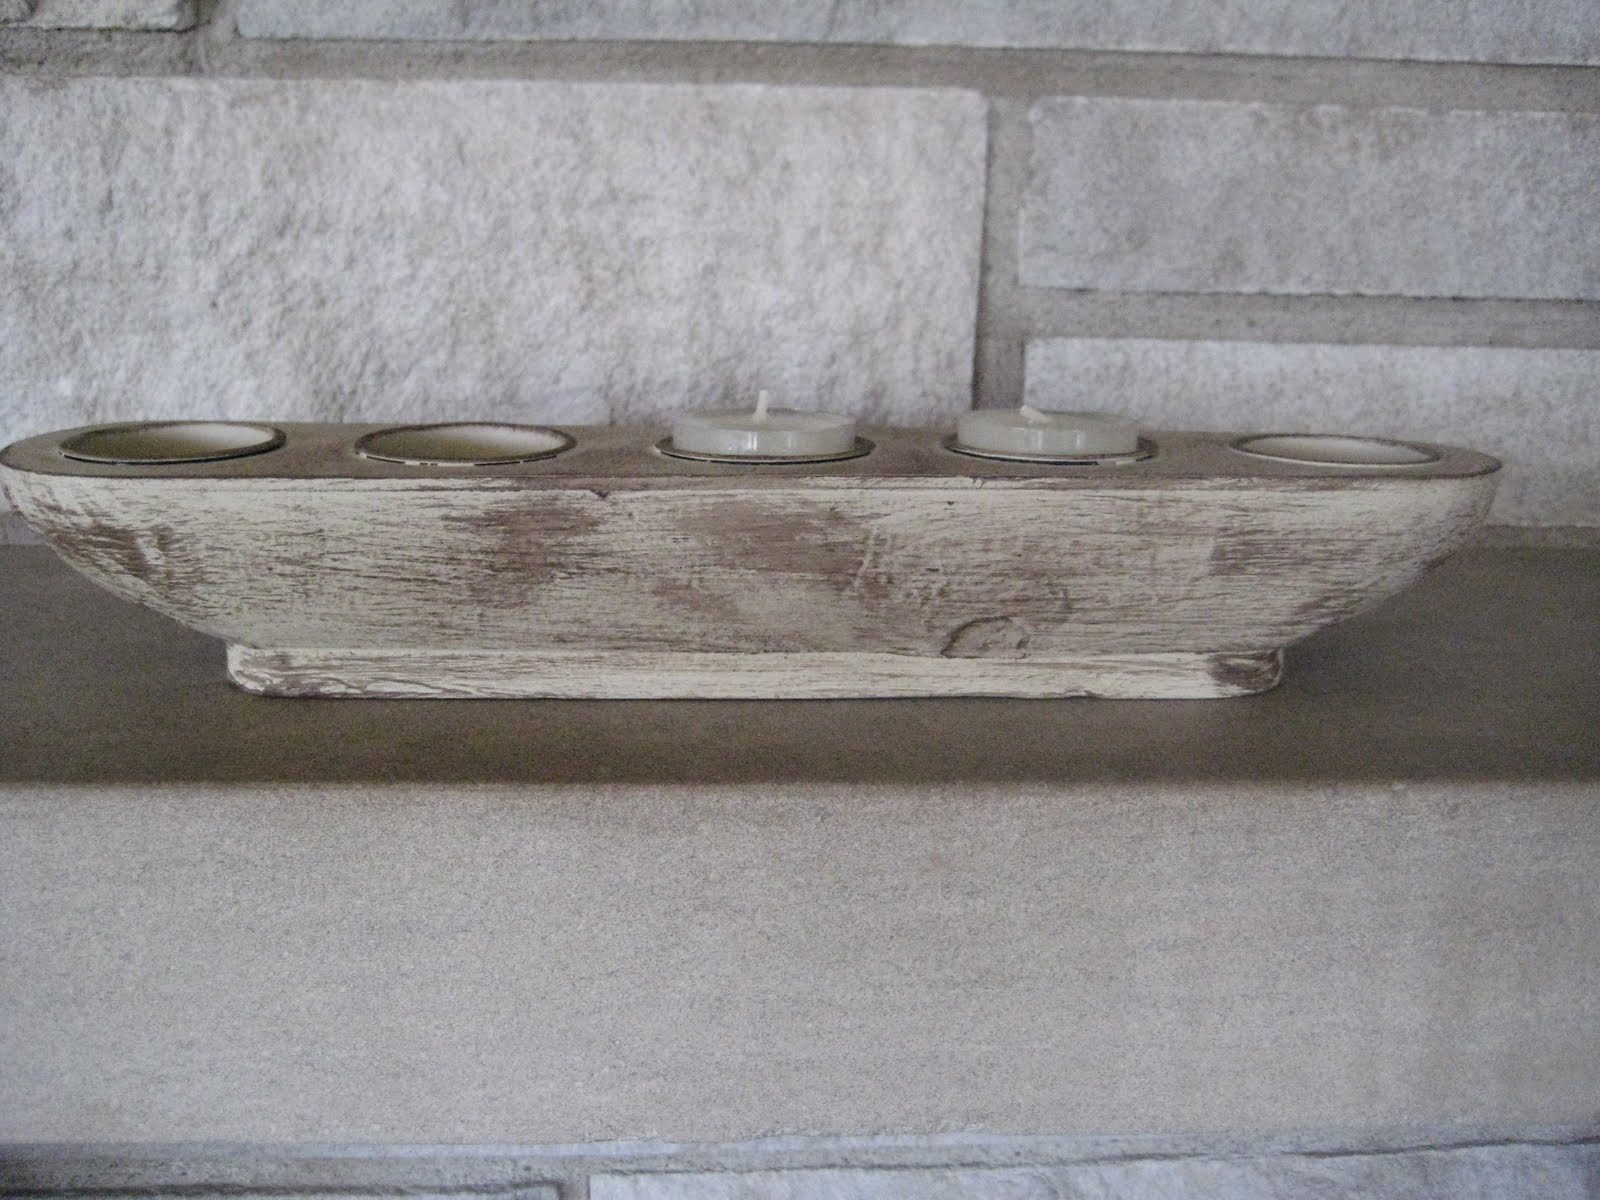
Goodwill Tealight Holder Redo

A few weeks ago, I went on a Shop and Hop trip in Indy with some great gals. One of my purchases was this gem for $1.99.

Yes, the coffee table that I flubbed up with crackle is my new work station :) I can't mess it up any worse than it already is!

I liked this candle holder because it isn't huge. And, it is wood. It is beat up a bit, but it is still solid. It is for tea lights and at the time of purchase, I remembered that 4 years ago, when we got married, we got a huge box of Yankee tea lights that were crammed in a closet.

I envisioned it looking like a piece of driftwood so I first gave it a good base coat of Behr Gobi Desert from my fantastic swag bag from the trip. 

I did this one night in the bonus room/office/room above the garage, so the lighting isn't great in some of the pics.

I gave it two fairly light coats. Mainly because I'm impatient and wanted it to dry quickly! :) Then, I drug out my three bottles of paint and started dry brushing. 

I ended up only dry brushing on the darkest brown I have. At first, I was just barely putting any on it. Then, I realized that it needed it to be a bit heavier or it was just going to look dirty. I like how the wood grain is just starting showing through. 


Then, once I had it dry brushed to my liking, I went in search of that 'huge box of tea lights". It was a huge box. Key word here: was. But apparently I have been burning them here and there over the past four years and forgot.... there were two left, ha!

I'm not sure where this is going to go, but I am happy with the final look and it is neutral enough that is can go in several places around the house. It is another of those pieces that the camera can't really make it look as good as it is. This isn't the best picture, but the colors are richer in real life.

Not bad for $1.99!

3.04.2010

i carry your heart with me

Over the past month or so I have really wanted to do something about this....


Hopefully those of you who commented on the last blog about her creeping you out don't get haunted. But really.... she's creepy...
 
If you see her twin on Antique Roadshow or Pawn Stars and she's worth $2 million if you don't do what I'm about to do to her, please don't tell me. 

Yesterday, I posted about the new look her frame just got. Well, she got quite the make over as well. Once I popped her out of the frame, I realized that she was one with her backing. It was thick, good stuff, so she got to stay.... sort of....

My BA is in English and I've always loved literature and a handful of poets. ee cummings is one of those I randomly enjoy. His poem i carry your heart with me speaks to me on many levels. 
i carry your heart with me(i carry it in
my heart)i am never without it(anywhere
i go you go,my dear; and whatever is done
by only me is your doing,my darling)

First, this poem is true about Dustin and me. We have a great relationship and I do carry his heart with me, as the poem states. Everything about this poem is us.
i fear
no fate(for you are my fate,my sweet)i want
no world(for beautiful you are my world,my true)
and it's you are whatever a moon has always meant
and whatever a sun will always sing is you

It also speaks to me about our son. I've not mentioned it here, but our first born was stillborn on May 27th, 2009, on our 3rd wedding anniversary. We were 37 weeks. So, this poem speaks to be also because I carry Lane with me. I carry him in my heart.  His stone has a stanza of a poem with the moon in it, so moons are Lane to me. I carry both Dustin and Lane every day everywhere I go. So, this poem needs to be in our home. 

here is the deepest secret nobody knows
(here is the root of the root and the bud of the bud
and the sky of the sky of a tree called life;which grows
higher than the soul can hope or mind can hide)
and this is the wonder that's keeping the stars apart

i carry your heart(i carry it in my heart) 
I also love tree outlines, so I searched the internet for a clip art tree. I messed around with the sizing; I stretched it around; I changed the colors. Since the poem refers to trees and roots and buds, I felt that this was appropriate as well. We don't have anything fancy. I messed around with the pic in Microsoft's Picture program... it was free with our computer apparently.

I put the poem in Microsoft Publisher and messed around with size, color and font until I had it just right. Then I put the clip art in. I have never used this program before either, but it was perfect. I made the sheet the size I wanted and messed around until I had it the way I wanted. (I started THIS part of the process in December.-- I wanted it JUST.....RIGHT)


I printed what you see and planned to cut and match it all up. I was editor of my high school newspaper and this was how I had to put the paper together each time to send off to be printed. Not the best solution, but a solution. Once I printed all 4 sheets on photo paper, I realized that if I made it just a bit smaller that I could print it on TWO sheets and only have a horizontal line to match up.  Oh, hindsight. So, I tweaked it a bit, moved it off to the side and up a bit more and printed it again.... on two sheets this time. I already had the glossy paper. If I had to buy some, I would have done it in a matte finish, but I used what I had.

Then, I needed something to matte the pic with. I didn't have any fun fabric... or paper.... or anything, really. But, I'm impatient and have 700 pages of the dictionary left from when I wallpapered the hall with it. So, I used it. I didn't want it to be noticeable or to take away from the poem so I cut it in strips with no words really sticking out. I also glued it to the scary girl (yeah, right over the top of her) sideways and upside down. 

 
My hope is that she won't be angry since I didn't cover her face :)
I didn't cover the whole "painting" because, well, I didn't need to. I just used clear tape rolled onto itself and stuck my poem on it. It did take some precise cutting. (I wished that I was a scrapbooker and had the cutting tools while I did this). But, overall, it was super easy.

Then, I put it all back in the frame, hung it up, and took some pics. 

The book page border might not stay, but for now, I still like it. 
 

Ole creepy gal has had quite the makeover this week! 


I know my directions aren't the best here. I was trying, unsuccessfully, not to be too wordy. So, if you want to try it out and need some tips or better directions, leave me a comment or shoot me an email.

3.03.2010

The new old frame

A few years ago, I found this beaut in Dustin's stuff after we bought our house.


Does she give you the willies as much as she does me? I cannot make eye contact with her. It is partially her expression and partially the fact that she is seemingly floating above the water. Creeps.. that's what I get when I look at this. Yes, I am sure I am just being unappreciative, but that still doesn't change the fact that she gives me goosebumps.

But, she has a cool wooden frame. It is 12 by 22.5, so I've not touched it until this week. Until now, I haven't had anything to put IN the frame to replace creepy floating girl and, to be completely honest, we halfway joke that she might haunt us when we touch her frame.Apparently she has the same effect on Dustin.

So far, so good... but, I still have the heebie jeebies.

The frame didn't have a bad paint job, but it was a little dirty looking and the dark color is actually glittery gold that I could live without. And, it was painted on pretty heavily and not super neatly. So, this weeekend, I gathered my courage and sprung her from her frame.


First, I gave it a good, clean base coat of satin white. It's what I had, so that's what she got. Then I dry brushed some Anita's All Purpose Acrylic Nubby Linen over it.


It wasn't quite enough for me, so I then dry brushed some Anita's Espresso Bean across it. 


Not the best pics taken, but hopefully they show the difference enough. After the Espresso Bean, I thought I had it on a bit heavy, so I wanted to mute it down a smidge. So, I dry brushed on a light coat of Americana's Bleached Sand. That detail doesn't capture well, so I won't post a picture and see if you can find all the differences :) It is a bit off white/light khaki, so it toned it all down a bit while still giving it some color over the white base.

It sounds like this process took a while. It took me about 3 minutes to paint it white. I let that dry and then it took me about 8 minutes total to do the drybrushing. It dries super fast, and I didn't mind if they mixed a little anyway. 

A close up of the new look..
 

It might not look incredibly different before and after, but, I got rid of the gold and gave it a bit more depth with the different shades of browns.  And, it just has a cleaner paint job on it now. 

I need to put the finishing touches on what is going to inside the frame. It has been a work in progress for a while now. It is pretty large and I've been trying to get the colors just right. I took a poem I love, found a great piece of clip art and have been playing around with colors, fonts, details to get it just right. Hopefully I'll have it in the frame for tomorrow and can include completed befores and afters.

Work/study break is over... back to essay grading and essay writing! :)

2.07.2010

Crackle success and some tips

Crackle looks good when it is done well... I got lucky on the crackle on my entertainment center. It crackled just the way I wanted. 

This pic is of the detail across the top and the top of the glass door. My only regret on this piece: I used a can of white paint left over from the bathroom trim and ceiling. So, it was semi gloss and the shine peaks through a bit. Oh well.. you wouldn't have noticed if I hadn't told. :)


As I said in my last post, I am not a crackle hater. But, I learned that it is hard to do it justice.


Before


Crackled
 

Details... (and a reflection of the window across the room :))


Dustin stripped the hinges for me. They ended up being silver. It didn't look right so he put a QUICK and LIGHT coat of black spray paint on them. Painted hinges always seem to gum up and chip, so a light coat was the way to go. The screws from the hinges didn't get all the white paint off of them. I kinda like that they aren't completely clean though. It helps them to show up a bit.

We also had these dark knobs left over from baby room projects, so they got drafted into this room. The knobs we took off are painted wood. I'm just not sure what to do with them. Paint them? Crackle them? So, we are testing out these for a while to see what we think.


Some crackle tips that I learned the hard way:

1. Have a practice piece. This was the table for me in my Snap, Crackle, and Flop post. At least I thought of a last minute cute title :) I am also glad that I didn't let the entertainment center be my practice piece. I can deal with fixing/stripping/whatever-I-do-to-it to the little coffee table.

2. Lay the piece flat if at all possible. The glass door and drawers all look better because they were flat. I didn't have gravity working against me.

3. When painting over the crackle, do so in little bitty bits. I didn't load up my brush on the entertainment center like I did the table. You can tell. When I did the table, I was painting it like I would have painted it regularly. Crackle isn't painting regularly. It takes smaller strokes and you need to get the hang of how much paint to have on the brush. This is the key when you can't lay the piece flat. You have to figure out how much you can use without it starting to roll down the piece.

4. Don't crackle in your bonus room/office/room above the garage. I used newspaper, but it just happened to run and drip off the table in the exact spot where I didn't have a paper, par for the course around here. Now, we have a nice teal place on the floor. (I pulled the recently acquired FREE couch over it ;) ) That's how we roll here. 
 

This piece isn't quite finished yet. He is going to cover the back with wood planks. I'm not sure if I'll paint that or cover it in fabric. Before he mentioned the wood backing, I had plans for fabric. But, he's all about reinforcing things so I won't complain :). I also want to look into trying to put a light or two inside shelves behind the glass door. But, it is done... enough...for now... :) 

(I kinda like projects/rooms/the house not being completely done.... what would I do then?)


2.03.2010

Snap, Crackle, and Flop

My crackle experience has been one of mixed emotions.

I am really pleased with the entertainment center. (its hinges are currently drying from the ZipStrip and the quick black spray paint they got) So, it is not camera ready quite yet.....

The bulletin board is painted, but not recovered yet....

and the table...

flop

I wasn't overly pleased with the table from the start... then I messed it up more.

It went from black to white to crackle. The crackle job looked really good...


in places.

But, in other spots, it crackled a bit too much...


It's  my fault. I saw someone post online that when they did it, they made sure to have a good, heavy load of paint on the brush. You can't really go over it twice. It is like the crackle sucks all the moisture out if the paint immediately. It is actually a pretty neat process to watch. Better than normally just wanting paint dry. (hehe) I took this advice to heart and loaded 'er up! Gravity was working against me though. Luckily, I did this piece first, so I knew better for the entertainment center. But, I didn't learn my lesson until I saw the teal paint dripping onto the carpet... oops...

I had plans to salvage this crackle job anyway. I was going to just paint over it all with a Cowboy Tan. (what we have left over from the living room and what I am going to use in places up here). I thought it would look cool one color with the crackle texture underneath. That was until I put a spray bottle of cleaner on it overnight this weekend... oops... it somehow left a ring of doom that will not go away. It also bubbled the paint. 


And then, I made it worse by trying to get the ring to be less noticeable.


So, now I have a crackled, bubbled, ringed, peeled coffee table. It is on hold until we can figure out a solution. My suggestion was to just strip it all and start over by just painting it. We'll see...


I am not a crackle hater. I actually really like it. This piece has just had problems. I was a bit unhappy with it before the ring, bubbles, and disaster struck. I'm not really happy with the color choice. I feel that I need to have my leg-warmered ankles propped up on it as I crimp my hair and smack my bubble gum. It screamed 80s as soon as the paint dried. :)

I will post crackle successes soon. This table is just becoming a nemesis :).

Related Posts with Thumbnails