Showing posts with label Canning and Preserving. Show all posts

8.27.2010

Just Peachy

This week, Mom stumbled upon some peaches. So, we made freezer jam and froze bags of peach chunks.


We used the same freezer jam mix that I used for strawberries.


They got put into boiling water for a minute or so and then into a bowl of cold water. This is also what we do to tomatoes to help get the peel off easier.

Then, with a potato  masher, I crushed them up. This is for the peaches we turned into freezer jam. It didn't seem to be smashing them up quite enough, so I also used a cup like I did with my strawberry freezer jam. 

We were afraid that this was going to make it a little too runny, but it ended up being perfect. If it is too runny, the packet of stuff we used says that you can cook the peaches for a while to thicken them before you add the sugar, lemon, and packet. 
What we made wasn't anything special :) But, it's GOOD. 
This is what we used and just followed the directions on the back. Super easy. 


I'll be honest. This wasn't hard. But. I am OVER canning/freezing/preserving for a while. So, I quit taking pictures. And complained to Mom that I just wanted to take a nap... and that I was over peaches... :)

So, for the peach chunks that we froze.... we peeled them and just chopped them up. Then, they got scooped into freezer bags. Mom also added some white grape peach juice to each of them also. This helped to get the air out of them and we didn't want to add sugar. 

So, I can't wait for it to cool off and we can much on veggie soup, peach chunks, and basil... well, maybe not all at once. I'm just ready for it to be cooler!

8.18.2010

Freezer Corn

I'm getting close to the end of my squirrel imitation for 2010. I've stored up a lot of yummies for this winter and our pantry is running out of room!

This is the first year I have done corn. So, there may be easier and better ways out there. But, this is how I did it and it worked.

First step: Beg, borrow, and steal corn off your friend's moms
*ok, ok... I just texted said friend and she and her mom helped me pick it.. :) Where's the drama in that?

So, pick the corn and then sit on your porch and shuck it. Luckily, I found an evening where the heat index was below 110 so I was able to sit and breathe while I worked :).

While you shuck the corn, watch out for beagles who think they own the place. The one who runs this house was getting the ends that I broke off. She took it upon herself to help herself to the good, full ears while I wasn't paying attention. She's lucky she's so stinkin cute. She held it and ate it like a person...


So, take all the corn, minus the ones nibbled on by the Beag, and put it in the house. Here, I rinsed it all off, cut out the bad places and made sure the bugs were all out.


Since I waited to do this until so late in the corn season around here, I got to deal with worms. It's always nice and disgusting to find a renegade slug in your kitchen.


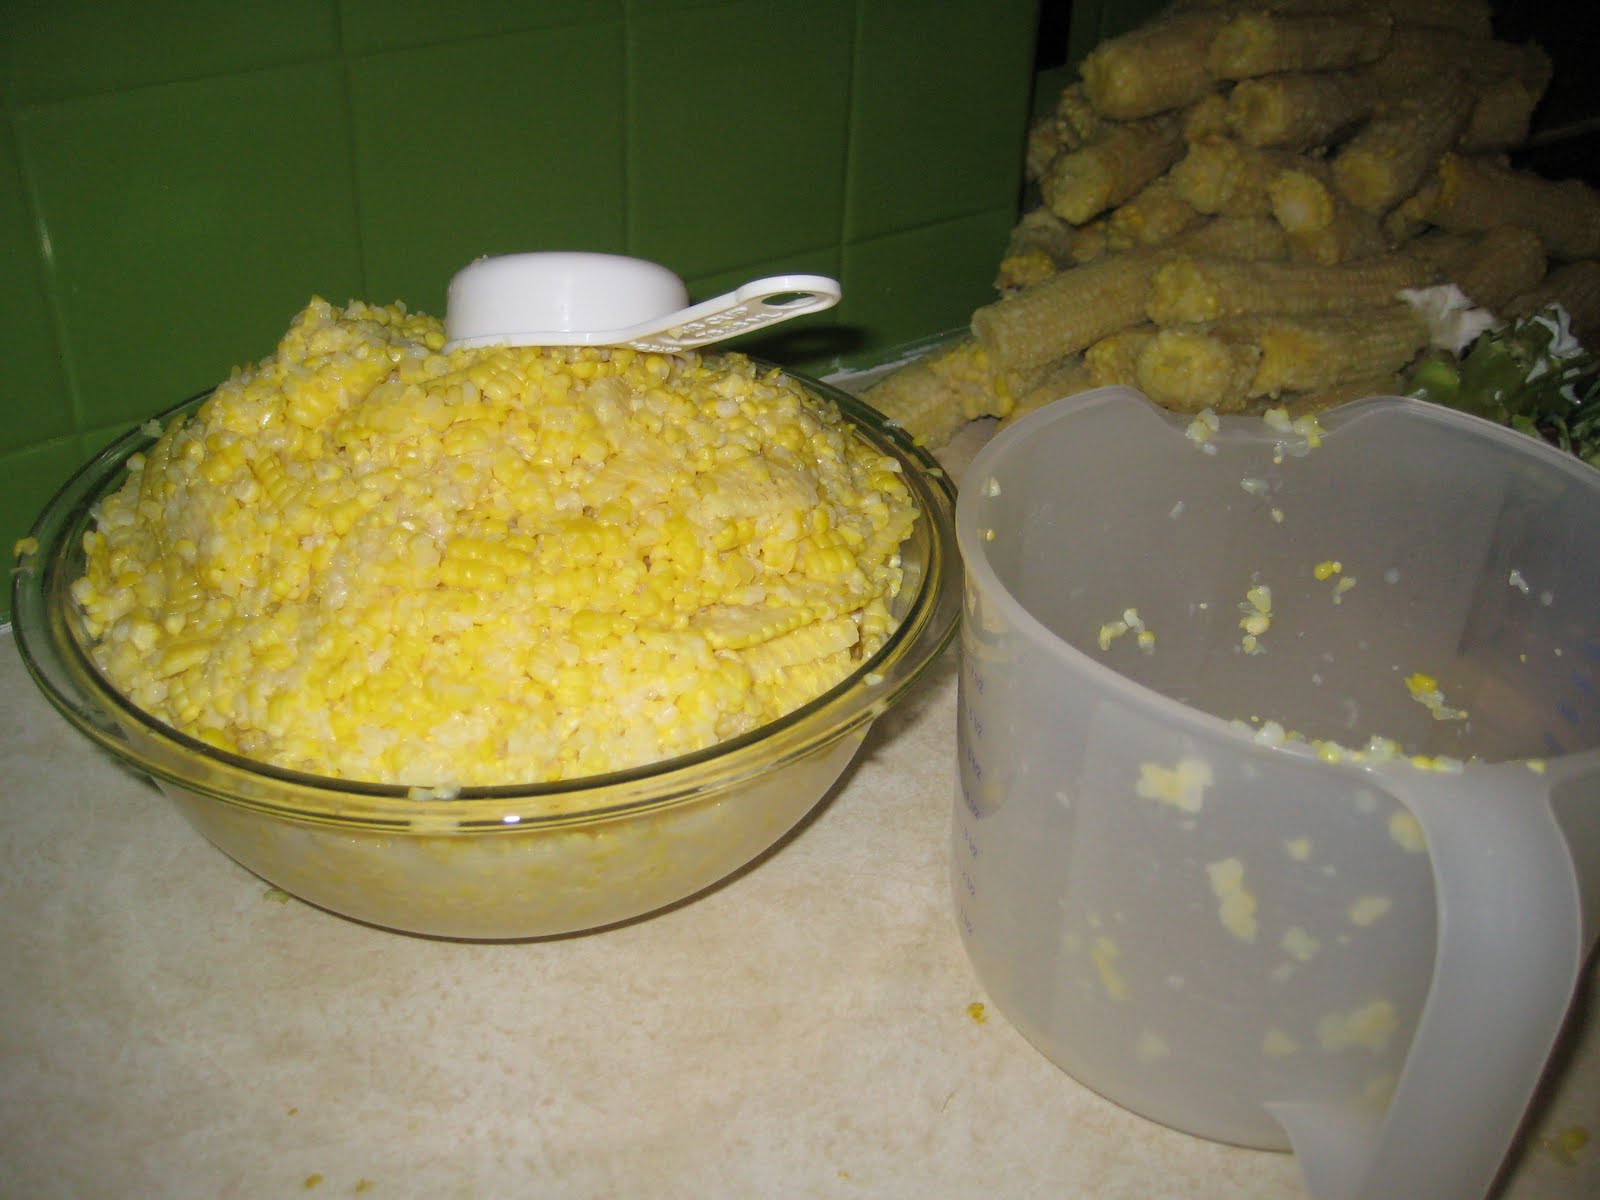
I then boiled my corn while it was still on the cob. Some people cut it off the cob first, but I only have stainless pots and knew I'd scorch it while it cooked. I filled up my bit canner and boiled the ears for 4 minutes. SUper easy.


Then, with tongs, the corn went from the boiling water to a sink full of icy water. I let it soak there for about 10 minutes and it was perfectly cool enough to cut off the cob by then.

*this is me pretending that this picture is horizontal even though I know it isn't... WHY do some pictures turn themselves while they are uploading?*

I used a serrated knife and just cut down each cob. I'm currently taking up a Pampered Chef order and am getting one of their kernel cutters for next year. Luckily, all our knives are so dull that they barely cut anything... but it worked great for this. I didn't get into the cob any. (you want to avoid cutting the cob too much or you have chunks of it with your corn)


Then, measure out the corn and bag it up. I found pint bags and put a heaping cup in each of them. It's just the two of us and I'd rather have to open two bags than only need half of a bag.I made sure to squeeze as much air as possible out of the bags to make them last better longer. I also labeled them with the year before they went to the freezer.


During the process, I was also canning beets and cooking salmon for dinner AND writing an essay.Like I said, I'm ready to be done with storing up for winter! But, these will be great to add to the veggie soup that I canned! (and, since I have 16 bags, they'll get added to a lot when the snow is flyin!)

Oh, and yes, in addition to the rouge bugs that will surface, this is just messy in general. There was corn on the floor (Ellie took care of that), corn on the backsplash, corn in my hair... not sure about that one still...

8.16.2010

Canning Bee 6: Pizza sauce turned tomato soup

Here is out first major OOPS.. but, it turned out ok.

Pizza Sauce Tomato Soup

We processed the tomatoes by boiling them until their skins cracked and then peeling them. (We did this process for salsa too).

Then, they went into the blender.


Mom and I had some miscommunication here I think...(I pictured sauce with some substance, she pictured thick but not chunky sauce-- we were unaware of this detail this early in the process though)

So, we got out her Kitchen Aid and this handy dandy attachment that takes out the pulp and leaves the juice. If you don't have one of these, we were lazy with our second batch of this and used another method that I"ll talk about in the end of this post.


We took the steaming hot tomatoes and de-pulped them, just leaving the juice. (The chickens LOVED this though!)


We were left with two pans full of straight up juice.


We added some herbs from Mom's garden and some store bought garlic (we've not ventured into growing our own garlic yet)


While the pots cooked and cooked and cooked in an effort to thicken them up, we boiled them over and made a huge mess. I laughed and said "THIS is why we can here and not at my house..."


We did have one packet of Mrs Wages Pizza Sauce. ONE. But, we had tomatoes enough to warrant about 5 of these packets. We still didn't realize this at this point though and added the stuff to our mix. It thickened in the spoon and in places and then it didn't thicken any more.


Two hours later with Sarah's arm all Jell-o-ie and steamy from stirring it- we were still soup consistency. We tasted it and it was good. I was impatient and tired of cooking it so we jarred it up and labeled it "SOUP". It is really yummy soup though. It is also 100% liquid. We added cornstarch and it didn't seem to touch it.


We processed it in a hot water bath (stacked double) for 35 minutes since they were pints. For quarts, they have to be in a rolling boil for 45 minutes.

Yesterday, we made soup on purpose and did it a bit differently. We processed and peeled the tomatoes and put them in the blender. Then, we poured the blended up chunky juice into a strainer. (We used a yellow one with a handle that Mom bought from Tupperware before I was born). It got all the seeds out and left a little bit of pulp so it is still soup and juice but has a little bit of substance to it too. We didn't add any spices to it this time either. That way, we can add it to chili or veggie soup or just make tomato soup with it... or... whatever other recipe that calls for "juicy tomatoes all crushed up and strained with no seasoning" :) I think that's what these will get labeled. We pressured these for 35 minutes at 10 lbs.  Mom read this and pointed out that we pressured them for 20 minutes. We did quarts again.

What you've missed:
Canning Bee #1: Beets
Canning Bee #2: Green Beans
Canning Bee #3: The best salsa EVER
Canning Bee #4: Tomato Chunks
Canning Bee #5: Veggie Soup

Coming soon- Freezer corn and 100% homemade marinara sauce (we found success this time)

And, coming in October: A complete redo of the room above the garage! I CAN'T WAIT. I like to can, but I am SO ready for a project involving less food and more paint! And, we spend a LOT of time in the winter up there so it will be great to have all this tomato soup to eat in the new and improved "room above the garage/office/livingroom/place where the treadmill gathers dust"!

8.15.2010

Save the basil!

We love basil in this house. In the dreary winter months, I really love having "fresh" herbs. Basil is the only herb I've ever preserved and I really like this method.


A few summers ago I planted a few rows of basil. When it was time to harvest it, I researched it and came up with this method. I thought about hanging it upside down and drying it, but then I needed to deal with hanging basil around the house.I also have a food dehydrator, but it didn't seem all that much different than just going to the store and buying a bottle of it already dried.

So, I made a concoction with it. A yummy concoction. 

This year, Mom has ONE plant that is producing like crazy. It is over 2 feet tall and has turned into a bush.

First, collect the leaves. Wash them off and put them in the blender. (I use my Magic Bullet)


Add some olive oil. I add quite a bit. (These directions remind me of my husband's grandma who died a few days before our wedding. She was known to give recipes with directions like "add milk til you think you have enough" :))

Blend it all up real well and pour into ice cube trays. I didn't add as much olive oil as I did a few years ago I don't think. It was more of a liquid while this year it had to be spooned into the trays. *note to self for the second batch I'm about to make....*


It looks gross. It looks like something gone wrong. It looks nasty even in my bad lighting for this picture. And it may make your ice taste like basil for a week or so afterwards. But, you'll love it.

Stick it in the freezer overnight and then pop them out and put them in a freezer bag. (Make sure to get as much air out as possible... air=freezer burn and ice crystals)

Then, this winter, get a cube out, pop it in a skillet and you are ready to go! This year we have switched over to all cast iron and stainless steel, so I'm even more ready to try these out since I have to use oil anyway!


8.05.2010

Canning Bee #5: Veggie Soup

I love, love, love having this in the winter. Nothing is better than a big pot of homemade veggie soup on a cold, snowy afternoon. (I'm also ready for some Octoberish type of weather around here! 115 degree heat index today, ugh. And, Dustin's at work... in pants and long sleeves over a fire all day)

VEGGIE SOUP


Prep all your veggies. We included carrots, green beans, zucchini, tomato chunks, cabbage, onions, and home grown herbs. (Corn and potatoes are added to it when we cook it to eat. Corn takes FOREVER to pressure  and I can't remember why Mom doesn't like to pressure potatoes)

We used a veggie peeler for the zukes.


All of the herbs, minus the garlic, were from Mom's little herb garden.


We prepped the tomatoes the same as we did for the tomato chunks.


We put it all in the pot and cooked it for about 45 minutes.

Then, load up the jars (that have been washed with lids that have been in hot water). 

When you can this, you have to check the time for each veggie that you use. Whichever has the longest determines the cooking time. That's why this doesn't have corn in it. Corn goes for 90 minutes-- we are way too impatient for that! :)

Our longest veggie time was for the zucchini. So, this processed for 45 minutes with 10lbs of pressure.

What you've missed:
Canning Bee #1: Beets
Canning Bee #2: Green Beans
Canning Bee #3: The best salsa EVER
Canning Bee #4: Tomato Chunks

Coming soon- some pizza sauce that ended up being tomato soup (It's pretty yummy soup, I must add...)

7.29.2010

Canning Bee #4: Tomato Chunks

Canning Bee #4: Tomato Chunks

As always, wash your jars. 


Drop the tomatoes into hot water. Leave them in a few minutes until the skin splits. Remove them and drop them into a sink filled will cold water. 
*Yeah, these are the salsa pictures... apparently we didn't take many pics of the tomato Canning Bee... oops... deal with it.... :)
 

Peel them, core them, and cut the bad places out of them. One bad spot can ruin the whole batch.
(this wasn't a cooked, peeled tomato... the skins fall off of them when they're been in the boiling water)

Chop them and put them in the pan to cook. We left the seeds in them because I don't care of there are some seeds in it. (And, it's a whole lot easier and we get more that way)

This made a consistency that is in between a sauce, juice, and chunks. I wanted it to add to things like chili this winter.


Add tomatoes to larger pot (non-stick) and boil gently for about 5 minutes.

 *yeah, sometimes it's hard to find things to take pics of for all these steps :)

Put into jars with 1/2 Tablespoon of vinegar and 1/2 teaspoon of salt.  (This is for pints... double if you do quarts).  Add on lids and rings. Make sure that there isn't anything on the rims or they won't seal.


Add jars to the canner. If you don't have enough jars for the canner, make up the difference with empty jars filled with water.


Close canner lid. Turn on stove and wait for steam to come out steadily. Flip down the pressure valve (if your canner is like the one on the left). Let canner build up tp 11 lbs of pressure and cook there for 10 minutes.

This day, we had two batches going, one right after another. Using two pressure cookers saved time because we didn't have to wait for the pressure in one to drop before we could start the other.

NEVER open one before the pressure has dropped to 0!

Coming soon: 

Canning Bee #5: Veggie soup

Canning Bee #6: Spaghetti/pizza sauce (We're making it now)

What you've missed:
Canning Bee #1: Beets
Canning Bee #2: Green Beans
Canning Bee #3: The best salsa EVER


7.23.2010

Canning Bee #3- SALSA!

warning: This salsa is so good that I have witnessed my husband (on more than one occasion) pick up the bowl when we're done/out of chips and DRINK what is left... and then look at me guiltily out of the corner of his eye to see if I saw. I always see... with a look of amazement each time.  (Sorry, Baby, the secret's out).

Without further ado...

The best salsa EVAH

*I chuckled after I wrote this because the woman we got the recipe's name is Eva.. 
**so much for that 'without further ado' promise

We begin with a 6-8 quart pan. You need enough tomatoes to fill half the pan and enough onions and bell peppers to fill the other half.
First, put the tomatoes in boiling water for a minute or so. Take them out when the skins start to split open. Drop them in a sink full of cold water. This makes them MUCH easier to peel.


Peel them and slice them up. Just a little. You don't need to cut them up small, just quarter them or so. Also in this step, cut out the bad places. One bad place in a tomato can ruin a whole batch of yummy salsa goodness. (Dustin would probably eat it anyway... it's that good...)


We use a food processor to do the dirty work. Mom used to cut this all up by hand.
 No thank you; I'll take the easy way out, please.

Then she used a crank food processor/chopper.
 No thank you; still too much work.

Now, we both have these. I HIGHLY recommend getting one.


While Sarah peeled and cut tomatoes, I cut up the bell peppers and onions.


Everything goes through the food processor first.


Even the garlic, cilantro, and jalapeno...
(We used one jalapeno with the seeds removed for a mild batch and about 4 small cloves of garlic)


Then, it all goes (after being food processed) into the pan along with the spices.

1 1/2- 2 cups sugar
1 1/2- 2 cups vinegar
1 tablespoon ground cumin
1 tablespoon salt
1 tablespoon cilantro (We used fresh, so we ended up using more)

(add more or less of each according to taste)

*My mom doesn't measure.... so the batch you see here is a bit vinegary

Cook/slowly boil for 1 1/2 to 2 hours.


After it's cooked, combine 2 tablespoons of cornstarch with 2 tablespoons of cold water in a cup. Slowly stir it into the pot. Stir it up pretty good or it can clump up, she says from experience of eating globs of salsa flavored cornstarch. It is fairly runny before this step but this typically thickens it up enough.


Start to fill the jars (that have been washed beforehand). We use a mug because it is easy to scoop with.Even with the mug, funnel, and towel underneath, this is still a messy, hot step in the process.


Fill the jars and wipe around the rim to make sure none sloshed on the side. 
(Anything on the rim will keep it from sealing).

Then, they go in the canner for 35 minutes for pints or 45 minutes for quarts. These get processed in a water bath. Fill the pot with water to at least 1 inch over the top of the jars. Start the timer when you have a full rolling boil and put the lid on the top. When the time is up, remove from the water and wait for the lid to seal and "pop".

We do pints because we would eat an entire quart every time we opened a jar if they were in bigger jars. We roll like that.

Check out Canning Bee #1 for BEETS

Canning Bee #2 for GREEN BEANS

Up next: Canning Bee # 4: Chopped Tomatoes (to add to soup this winter, yummmmm)

Related Posts with Thumbnails